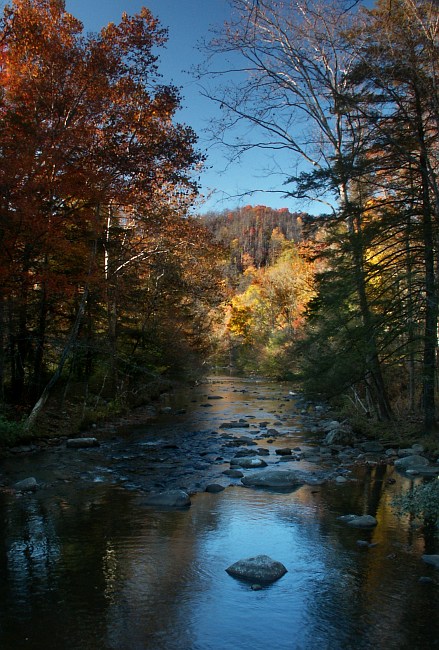
Little River at Metcalf Bottoms, GSMNP


Posted by Dan Heimsoth on Mon Nov 17, 2003 8:55 am

All times are UTC-05:00

Reply to topic  
 First unread post  | 7 posts | 
Image
Minolta D7, 2 stop GND, polarizer, f8, 1/30.
Dan Heimsoth

Posted by:
Dan Heimsoth
Forum Contributor
Location: Cary, NC
Posts: 16
Joined: 12 Nov 2003


by E.J. Peiker on Mon Nov 17, 2003 10:45 am
User avatar
E.J. Peiker
Senior Technical Editor
Posts: 86788
Joined: 16 Aug 2003
Location: Arizona
Member #:00002
Very nice shot. It looks like a three stop fitler or taking two exposures and combining them would have made it even better.
 

by Dick Ginkowski on Mon Nov 17, 2003 11:39 am
Dick Ginkowski
Forum Contributor
Posts: 6447
Joined: 31 Aug 2003
Location: Pleasant Prairie, WI
I was there this fall (perhaps at the same time) and know how hard it was to squeeze anything out of the Smokies this year in terms of fall color.

I like this shot as is...and also with a judicious crop of the sky. Either works.
 

by João Quintela on Mon Nov 17, 2003 4:42 pm
User avatar
João Quintela
Forum Contributor
Posts: 934
Joined: 28 Sep 2003
Location: Aveiro; Portugal
Like this one...I think the foreground rock works very well.
 

by Ken Cravillion on Mon Nov 17, 2003 9:26 pm
User avatar
Ken Cravillion
Forum Contributor
Posts: 8534
Joined: 21 Aug 2003
Location: Oshkosh!!!
Member #:00072
Ditto EJ's comment about two exposures or a ND filter. Nice shot otherwise.
Ken Cravillion
 

by Anders on Tue Nov 18, 2003 2:17 am
User avatar
Anders
Lifetime Member
Posts: 862
Joined: 21 Aug 2003
Location: San Francisco Bay Area, CA, USA
Member #:00156
Very nice. I like the middle blue path leading up to the yellows n the background. I agree that using some technique to open up the shadows would improve it further.

There is actually plenty of detail in the shadows here. I took the liberty to play with the image a bit. Here is roughly what I did:

1. Copy the image so you have two windows with the same image in PS.
2. Take one and use curves to open up the shadows so they look right. The highlights will go white, but that's ok.
You now have one version of the image where the highlights are correctly exposed and another where the shadows are correctly exposed.
3. In the dark version, do ctrl-a (select all), and ctrl-c (copy).
4. Move to the bright version, do ctrl-v (paste). This will create a layer on top of the bright layer with the dark layer.
5. Add an adjustment layer to the dark (top) layer (second icon from the left at the bottom of the layers panel).
6. Click in the adjustment layer, select the 'channels' tab in the layers panel and click to get an 'eye' for the bottom channel, the 'Layer 1 mask' channel.
7. Do ctrl-v (paste). You now have a copy of the dark version of the image in the adjustment layer (and it looks red since that is the default color for the adjustment layer). Click the 'eye' to not show the red for the adjustment layer.
8. Go back to the 'layers' tab and make sure the adjustment layer is active.
9. Do Filter -> Blur -> Gaussian blur, radius 4-40 (in this case 20 worked fine).

You now 'magically' have a mix of the right dark and bright regions of the two versions of the image. Fine tune by applying levels and/or curves to the adjustment layer to fine tune the blend.

Enjoy,


Anders
 

by Dan Heimsoth on Tue Nov 18, 2003 8:39 pm
Dan Heimsoth
Forum Contributor
Posts: 16
Joined: 12 Nov 2003
Location: Cary, NC
Thanks for all the comments and suggestions, I appreciate them. Anders, I'll give the editing technique a try and see what I can come up with.
Dan Heimsoth
 

Display posts from previous:  Sort by:  
7 posts | 

Powered by phpBB® Forum Software © phpBB Group